上士闻道,勤而行之
2014年8月31日 09:39
上士闻道,勤而行之。中士闻道,若存若亡。下士闻道,大笑之。不笑不足以为道。
<meta charset="UTF-8" />
<body>
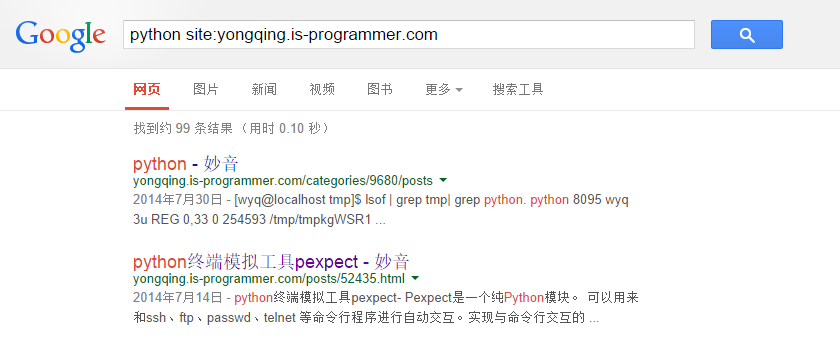
<!-- 调用google搜索 -->
<form method=get action="http://www.google.com/search" target="_blank">
<!-- input的中name必须为q,否则提交失败,返回google首页-->
<input type=text name=q size=40 maxlength=255 >
<!--input type=hidden name=sitesearch value="yongqing.is-programmer.com"-->
<input type=submit name=btnG value="谷歌搜索">
</form>
<!-- 调用baidu搜索 -->
<form action="http://www.baidu.com/baidu" target="_blank">
<!-- input的中name必须为word,否则提交失败,返回baidu首页-->
<input type=text name=word size=40>
<!--input type=hidden name=si value="yongqing.is-programmer.com"-->
<input type="submit" value="百度搜索">
</form>
<!-- 调用yahoo搜索-->
<form action="http://www.yahoo.com.cn/search">
<input type=text name="p">
<!--input type=hidden name=vs value="yongqing.is-programmer.com"-->
<input type="submit" value="Yahoo 搜索">
</form>
</body>
<!–Google站内搜索–>
<form method=get action=”http://www.google.com/search”>
    <input type=text name=q>
    <input type=submit name=btnG value=”Google 搜索”>
    <input type=hidden name=sitesearch value=”yongqing.is-programmer.com”>
    <input type=hidden name=hl value=zh-CN>
    <input type=hidden name=ie value=utf-8>
    <input type=hidden name=oe value=utf-8>
</form>
class my_render_jinja:
    """Rendering interface to Jinja2 Templates

    Example:

        render= render_jinja('templates')
        render.hello(name='jinja2')
    """
    def __init__(self, *a, **kwargs):
        extensions = kwargs.pop('extensions', [])
        globals = kwargs.pop('globals', {})

        from jinja2 import Environment, FileSystemLoader
        self._lookup = Environment(loader=FileSystemLoader(*a, **kwargs), extensions=extensions)
        # 添加下面两句代码,修改标识符
        self._lookup.variable_start_string = '{{ '
        self._lookup.variable_end_string = ' }}'
        self._lookup.globals.update(globals)

    def __getattr__(self, name):
        # Assuming all templates end with .html
        path = name + '.html'
        t = self._lookup.get_template(path)
        return t.render
# 可以通过以下方式访问
import jinja2
jinja2.defaults.VARIABLE_START_STRING
jinja2.defaults.VARIABLE_END_STRING
jinja2.environment.VARIABLE_START_STRING
jinja2.environment.VARIABLE_END_STRING

# 使用以下方式赋值均无效
jinja2.defaults.VARIABLE_START_STRING = '{{ '
jinja2.defaults.VARIABLE_END_STRING = ' }}'
jinja2.environment.VARIABLE_START_STRING = '{{ '
jinja2.environment.VARIABLE_END_STRING = ' }}'
__docformat__ = 'restructuredtext en'
__version__ = '2.7.2'

# high level interface
# 在此处添加下面三句代码
import defaults
defaults.VARIABLE_START_STRING = '{{ '
defaults.VARIABLE_END_STRING = ' }}'
from jinja2.environment import Environment, Template

# loaders
from jinja2.loaders import BaseLoader, FileSystemLoader, PackageLoader, \
     DictLoader, FunctionLoader, PrefixLoader, ChoiceLoader, \
     ModuleLoader
{{ number_expression | number : fractionSize}}
$filter('number')(number, fractionSize)
<!doctype html>
<html ng-app='demo'>
<meta charset='utf-8'>
<body>
<div ng-controller="ExampleController">
  输入数字: <input ng-model='val'><br>
  <!-- 默认格式 -->
  默认格式: <span id='number-default'>{{val | number}}</span><br>
  <!-- factionSize=0 -->
  保留0位: <span>{{val | number:0}}</span><br>
  <!--factionSize大于小数点位数 -->
  保留10位: <span>{{val | number:10}}</span><br>
  <!-- factionSize小于小数点位数-->
  保留2位: <span>{{val | number:2}}</span>
</div>

<script src="/static/lib/angular/angular.js"></script>
<script src="/static/lib/angular-resource/angular-resource.min.js"></script>
<script>
    var app = angular.module('demo', ['ngResource'])
    .controller('ExampleController', function($scope) {
        $scope.val = 1234.56789;
    });
</script>
</body>
</html>
输入数字: 1,234.56789
默认格式: 1,234.568
保留0位: 1,235
保留10位: 1,234.5678900000
保留2位: 1,234.57
[wyq@localhost ~]$ python -m SimpleHTTPServer 8080
Serving HTTP on 0.0.0.0 port 8080 ...
[wyq@localhost ~]$ telnet localhost 9000
Trying 127.0.0.1...
telnet: connect to address 127.0.0.1: Connection refused
[wyq@localhost ~]$ telnet localhost 8080
Trying 127.0.0.1...
Connected to localhost.
Escape character is '^]'.
[wyq@localhost monitor]$ python -m SimpleHTTPServer 8080
Serving HTTP on 0.0.0.0 port 8080 ...
[wyq@localhost ~]$ telnet localhost 8080
Trying 127.0.0.1...
Connected to localhost.
Escape character is '^]'.
a
<head>
<title>Error response</title>
</head>
<body>
<h1>Error response</h1>
<p>Error code 400.
<p>Message: Bad request syntax ('a').
<p>Error code explanation: 400 = Bad request syntax or unsupported method.
</body>
Connection closed by foreign host.
[wyq@localhost monitor]$ python -m SimpleHTTPServer 8080
Serving HTTP on 0.0.0.0 port 8080 ...
127.0.0.1 - - [22/Aug/2014 07:15:16] code 400, message Bad request syntax ('a')
127.0.0.1 - - [22/Aug/2014 07:15:16] "a" 400 -
[wyq@localhost ~]$ ssh -v -p 9000 wyq@localhost
OpenSSH_6.4, OpenSSL 1.0.1e-fips 11 Feb 2013
debug1: Reading configuration data /home/wyq/.ssh/config
debug1: Reading configuration data /etc/ssh/ssh_config
debug1: /etc/ssh/ssh_config line 51: Applying options for *
debug1: Connecting to localhost [127.0.0.1] port 9000.
debug1: connect to address 127.0.0.1 port 9000: Connection refused
ssh: connect to host localhost port 9000: Connection refused
[wyq@localhost ~]$ ssh -v -p 8080 wyq@localhost
OpenSSH_6.4, OpenSSL 1.0.1e-fips 11 Feb 2013
debug1: Reading configuration data /home/wyq/.ssh/config
debug1: Reading configuration data /etc/ssh/ssh_config
debug1: /etc/ssh/ssh_config line 51: Applying options for *
debug1: Connecting to localhost [127.0.0.1] port 8080.
debug1: Connection established.
debug1: identity file /home/wyq/.ssh/id_rsa type 1
debug1: identity file /home/wyq/.ssh/id_rsa-cert type -1
debug1: identity file /home/wyq/.ssh/id_dsa type -1
debug1: identity file /home/wyq/.ssh/id_dsa-cert type -1
debug1: identity file /home/wyq/.ssh/id_ecdsa type -1
debug1: identity file /home/wyq/.ssh/id_ecdsa-cert type -1
debug1: Enabling compatibility mode for protocol 2.0
debug1: Local version string SSH-2.0-OpenSSH_6.4
debug1: ssh_exchange_identification: <head>

debug1: ssh_exchange_identification: <title>Error response</title>

debug1: ssh_exchange_identification: </head>

debug1: ssh_exchange_identification: <body>

debug1: ssh_exchange_identification: <h1>Error response</h1>

debug1: ssh_exchange_identification: <p>Error code 400.

debug1: ssh_exchange_identification: <p>Message: Bad request syntax ('SSH-2.0-OpenSSH_6.4').

debug1: ssh_exchange_identification: <p>Error code explanation: 400 = Bad request syntax or unsupported method.

debug1: ssh_exchange_identification: </body>

ssh_exchange_identification: Connection closed by remote host
[wyq@localhost ~]$ python -m SimpleHTTPServer 8080
Serving HTTP on 0.0.0.0 port 8080 ...
127.0.0.1 - - [22/Aug/2014 13:32:55] code 400, message Bad request syntax ('SSH-2.0-OpenSSH_6.4')
127.0.0.1 - - [22/Aug/2014 13:32:55] "SSH-2.0-OpenSSH_6.4" 400 -
[wyq@localhost ~]$ wget localhost:9000
--2014-08-22 13:36:42--  http://localhost:9000/
正在解析主机 localhost (localhost)... 127.0.0.1
正在连接 localhost (localhost)|127.0.0.1|:9000... 失败:拒绝连接。
[wyq@localhost ~]$ wget localhost:8080
--2014-08-22 13:37:22--  http://localhost:8080/
正在解析主机 localhost (localhost)... 127.0.0.1
正在连接 localhost (localhost)|127.0.0.1|:8080... 已连接。
已发出 HTTP 请求,正在等待回应... 200 OK
长度:2770 (2.7K) [text/html]
正在保存至: “index.html”

100%[======================================>] 2,770       --.-K/s 用时 0s

2014-08-22 13:37:22 (105 MB/s) - 已保存 “index.html” [2770/2770])
SQL> connect / as sysdba
已连接。
SQL> exec dbms_xdb.sethttpport(8081);
PL/SQL过程已成功完成。
switch(nodeType) {
  case 1: /* Element */
    // use the node name: <directive>
    //此处是解析标签形式的指令
    addDirective(directives,
        directiveNormalize(nodeName_(node).toLowerCase()), 'E', maxPriority, ignoreDirective);

    // iterate over the attributes
    for (var attr, name, nName, ngAttrName, value, isNgAttr, nAttrs = node.attributes,
             j = 0, jj = nAttrs && nAttrs.length; j < jj; j++) {
      var attrStartName = false;
      var attrEndName = false;

      attr = nAttrs[j];
      if (!msie || msie >= 8 || attr.specified) {
        name = attr.name;
        value = trim(attr.value);

        // support ngAttr attribute binding
        ngAttrName = directiveNormalize(name);
        if (isNgAttr = NG_ATTR_BINDING.test(ngAttrName)) {
          name = snake_case(ngAttrName.substr(6), '-');
        }

        var directiveNName = ngAttrName.replace(/(Start|End)$/, '');
        if (ngAttrName === directiveNName + 'Start') {
          attrStartName = name;
          attrEndName = name.substr(0, name.length - 5) + 'end';
          name = name.substr(0, name.length - 6);
        }

        //此处是解析属性形式的指令名
        nName = directiveNormalize(name.toLowerCase());
        attrsMap[nName] = name;
        if (isNgAttr || !attrs.hasOwnProperty(nName)) {
            attrs[nName] = value;
            if (getBooleanAttrName(node, nName)) {
              attrs[nName] = true; // presence means true
            }
        }
        addAttrInterpolateDirective(node, directives, value, nName);
        addDirective(directives, nName, 'A', maxPriority, ignoreDirective, attrStartName,
                      attrEndName);
      }
    }
var PREFIX_REGEXP = /^(x[\:\-_]|data[\:\-_])/i;
/**
 * Converts all accepted directives format into proper directive name.
 * All of these will become 'myDirective':
 *   my:Directive
 *   my-directive
 *   x-my-directive
 *   data-my:directive
 *
 * Also there is special case for Moz prefix starting with upper case letter.
 * @param name Name to normalize
 */
function directiveNormalize(name) {
  return camelCase(name.replace(PREFIX_REGEXP, ''));
}
var SPECIAL_CHARS_REGEXP = /([\:\-\_]+(.))/g;
var MOZ_HACK_REGEXP = /^moz([A-Z])/;
var jqLiteMinErr = minErr('jqLite');

/**
 * Converts snake_case to camelCase.
 * Also there is special case for Moz prefix starting with upper case letter.
 * @param name Name to normalize
 */
function camelCase(name) {
  return name.
    replace(SPECIAL_CHARS_REGEXP, function(_, separator, letter, offset) {
      return offset ? letter.toUpperCase() : letter;
    }).
    replace(MOZ_HACK_REGEXP, 'Moz$1');
}
var SPECIAL_CHARS_REGEXP = /([\:\-\_]+(.))/g;
function camelCase(name) {
  return name.
    replace(SPECIAL_CHARS_REGEXP, function(_, separator, letter, offset) {
      console.log("_:" + _)
      console.log("separator:" + separator)
      console.log("letter:" + letter)
      return offset ? letter.toUpperCase() : letter;
    }).
}
console.log("----my-directive")
console.log(camelCase(my-directive));

console.log("----mydirective")
console.log(camelCase(my-directive));

console.log("----mydirectiveworld")
console.log(camelCase(my-directive));
/*
输出内容
----my-directive
_:-d
separator:-d
letter:d
myDirective

----mydirective
mydirective

----mydirectiveworld
mydirectiveworld
*/
以分割符"-"为例
mymenu --> mymenu   正确
mymenu --> myMenu   错误
mymenu --> my-Menu  错误

myMenu --> my-Menu  正确
myMenu --> myMenu   错误
myMenu --> mymenu   错误

MyMenu --> x-MyMenu 正确
MyMenu --> MyMenu   错误
MyMenu --> mymenu   错误

myProductsMenu --> my-Products-Menu   正确
myProductsMenu --> myProductsMenu     错误
myProductsMenu --> my-ProductsMenu    错误
stringObject.replace(regexp/substr, newSubStr/function)
var str = "Visit Microsoft!";
var res = str.replace("Microsoft", "W3Schools");
name = "Doe, John";
name.replace(/(\w+)\s*, \s*(\w+)/, "$2 $1");
//输出"John Doe"
function(match, p1, p2,..., offset, string)
var name = "ace:mm-Abc".replace(/([\:\-\_]+(.))/, function(match, p1, p2, offset, total){
        console.log("match:" + _);
        console.log("p1:" + separator);
        console.log("p2:" + letter);
        console.log("offset:" + offset);
        console.log("total:"+ total)
        return offset ? p2.toUpperCase() : p2;
})
console.log(name)
/*输出
substr::m test.html:43
p1::m
p2:m
offset:3
total:ace:mm-Abc
aceMm-Abc
*/